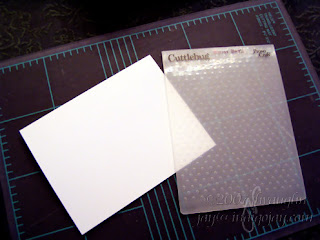
Up above are a topfold card and the new Swiss Dots Cuttlebug A2 embossing folder.
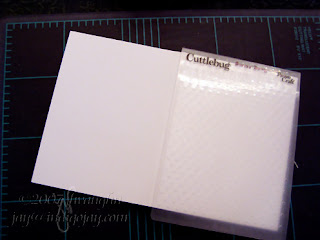
I positioned the front of the card in the folder. You can fold the back behind the folder, but I just left mine hanging out. Yeah, I'm wild. ;-)
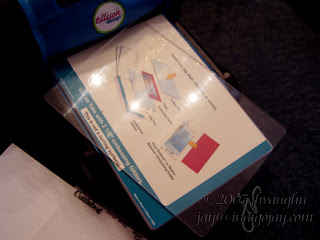
This is my Big Shot set-up. I have it open to the layer that I need and I have one clear plate on it ready to go.
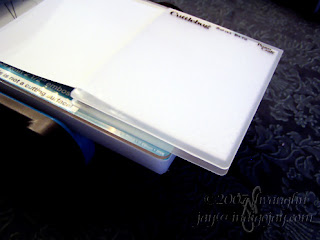
Now my plan is to emboss the top 2/3 or so of the card, leaving about an inch unembossed at the bottom. Here I've placed the folder and the card so that the part I want to leave unembossed will hang out over the back edge of the platform and won't be compressed as I roll the layers through.
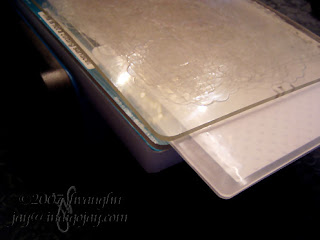
Now I've added the clear top (and obviously well-used!) cutting plate, still leaving that last bit outside the "sandwich".
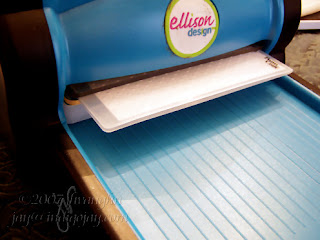
Roll it through! You can see that the trailing edge won't be embossed, eh? Really, it won't.
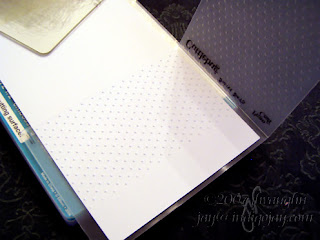
See? It really worked.
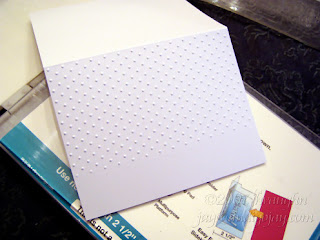
That's just another view of the partial Cuttling of the cardfront.
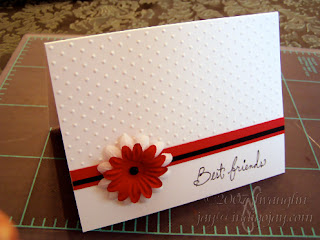
And here's a card that I made using that partially Cuttled card. Just ignore the fact that I somehow managed to catch a thumb or finger in that photo. LOL! I imagine that this should work with the Cuttlebug, too.

Thanks you so much for this step by step guide! I have the Wizard and so I've adapted the instructions for my machine. I have a question!
ReplyDeleteI still don't have the swiss dot folder so I used the D'vine Swirl and that last bit outside the "sandwich" was not a clean a line like the real edge the Cuttlebug folder makes. Was yours a clean line? I think an easy fix would be to use a ribbon? But your line looked cleaner than mine:-) I will continue to play but welcome any further tips!
sfhardin@tds.net
Great tip! I will definitely be giving this a try
ReplyDeleteSTUNNING card! Thanks for the tutorial. I'll give this a try!
ReplyDeleteThis comment has been removed by the author.
ReplyDeletegreat tutorial ! i had a go too !
ReplyDeletehttp://maisymary.blogspot.com/2008/03/partial-cuttling.html
Very nice. Thanks for the tutorial.
ReplyDeleteYou are the best. Thanks for the tut.
ReplyDeleteOh wow, what a fabulous card, I love my cuttlebug so much and was thinking of how to do this method, thanks so much. Great tuition.
ReplyDeleteSomeone at SCS mentioned your blog. This is the clearest I have ever seen these directions and it finally makes sense to me! Thank you!
ReplyDeleteKathy
Wow, Gorgeous card. I love your blog. I can't wait til I can get my big shot. Thanks so much for all the great information.
ReplyDeleteGlad that everyone is finding information that they can use. Deb, I hope you get your hands on your Big Shot soon. It's a great machine!
ReplyDeleteThanks to all of you for stopping by!
thanks heaps for the information I tried it & love the results :o)))
ReplyDeletecheers Leonie from Australia
Always wondered how this was done! Thanks for the awesome tutorial! Gonna give this a go :) Love your blog too :)
ReplyDeleteI am new to this and reading your archives. The techniques you develop are amazing!!
ReplyDeleteThanks for sharing
Barbara
Thank so much for sharing this!
ReplyDeleteHi! Thanks so much for the tutorial but I'm missing something ... Where do you place the folder on the card? I'm sorry I'm not quite understanding the technique :(
ReplyDeleteThanks again,
Kimberly