
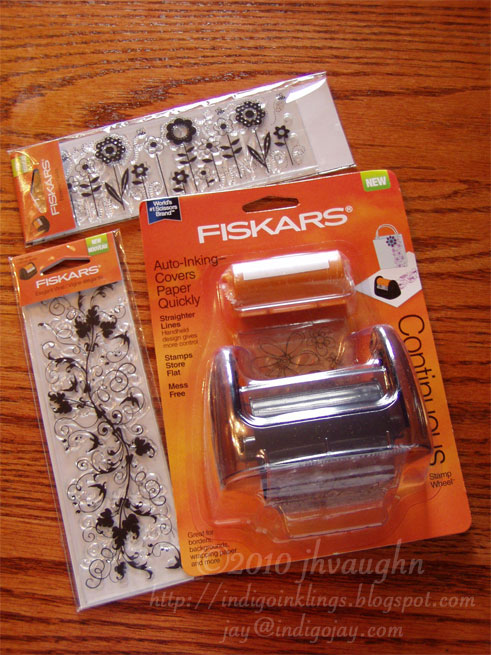
So, pictured above are the Continuous Stamper and a couple of clear stamps made for use with this tool. I liked the stamps, even if the stamper might be a bust.

This is the stamper out of the packaging. It's small and lightweight. You can see the roller that the stamp will be attached to. There are also some plastic guides on the housing, front and back, (one is near the tip of my thumb) to help with aligning your design. Simple really.

Here's a view of the bottom.

And here's how the roller looks when it's been popped out by a simple push from above.

Those two orange knobs pull away from each other to unlock the roller and allow it to open up. Once open, you can see the small square hooks that hold the ends of the stamp in place. My left index finger is conveniently pointing to them.

Here you can see that holes at the end of the stamp that fit over those hooks.

Above you can see that I've attached one end.

Now I've wrapped the stamp around the roller and am attaching the other end to the hooks. There is a slightly raised edge on each side of the roller to help align the stamp.

Now the roller is closed.

This is just a view of the other side so that you can get a sense of that raised edge.

Pop that roller back into place. By the way, it takes a lot longer to explain this than to actually do it. :-)

The starter kit comes with a black ink cartridge that's shown above.

It has a couple of knobs that fit into a couple of notches. To help make sure that it's loaded correctly, one set of knobs and notches is bigger than the other, so take a good look before trying to force something that might not be lined up properly.

This is the bigger set.

Here's the smaller pair. The fan-like grooves will be what lock the cartridge in place.

Click the ink cartridge into position.

Remove the cover over the ink roller and set it aside. Don't throw it away. You use it to cover the ink again when you're finished. Rotate the cartridge to lock it into place. Now you're set!

Here's the tool all prepped and ready to go.

It's time to roll! I'd advise using your dominant hand for this. I'm using my left hand because the right one is taking pictures.

I have to say that this was easy to roll and keep straight, even left-handed. I've seen better ink coverage though.

And here's how the design looked after I made a second pass.
What do I think of this? It is a little work to set up, but I like the idea of continuously stamping and not having to reink. That's a plus over using these stamps with clear blocks. Now I didn't really prep the stamp that I used, and to be fair I should probably do that before saying the the image quality wasn't the greatest, but I have liked results better using other inks, like Versafine or Memento which tend to cover better. This system does force you to use their ink. Clean up was a little messy, too, but not bad. They recommend removing the ink cartridge and then replacing it with a damp towel and rolling on scrap paper. I just "stamped off" the ink after removing and putting away the ink cartridge. You're also limited in the colors that you can use, though they do offer several colors to choose from. I haven't had this long enough yet to know how long the ink will last.
So, for the price, I think that this tool can be very useful for its specific purpose. If I'm making a bunch of cards and using similar designs on all of them, I could see pulling this out and having it be a time-saver. Would probably be fun to stamp in multiple colors and perhaps even combine some of the designs as well. I may have to give that a try. At this point I only have the black ink though, so that'll have to wait--at least until my next trip to Joann's. :-)
Thanks for the product review! I've seen these at my local Michael's and wondered about them but didn't buy. I can see where this could be pretty useful if you had to "mass produce" cards or background paper. I guess I'll have to pay more attention next time I'm at Mike's to see what the other stamp patterns are. Thanks again. You did a great job!
ReplyDeleteWhat a clever tool. Thanks for all the photos. I wouldn't have looked twice at it in the store had I not seen this post.
ReplyDeleteThink of the pretty papers you could make by coloring in the shapes or doing watercolor washes for a background.
Thanks for sharing!
ReplyDeleteI am really interested in getting one of these and came across your blog when I was searching about them!
This is a cool tool! I picked up one today at Joanne Fabric for 50% off. I just wanted to play with it so I did not get the additional stamp pads but plan to (maybe tomorrow). It was a little challenging to get the stamp to hold on but once I got the hang of it there was no trouble. :) Love Fiskars products!!!
ReplyDeleteThis is a cool tool! I picked up one today at Joanne Fabric for 50% off. I just wanted to play with it so I did not get the additional stamp pads but plan to (maybe tomorrow). It was a little challenging to get the stamp to hold on but once I got the hang of it there was no trouble. :) Love Fiskars products!!!
ReplyDelete