
Hopefully this is better late than never--it's the instructions for making my extra postage mini envelopes. I used a 3" x 3" square piece of patterned paper, but I think that you could use almost any size square. The patterned side goes face down on the table and then you make the folds as I've indicated in the pic. It goes very quickly because all you do is fold and then tuck the last flap in. No glue necessary. Then decorate the front as you wish.
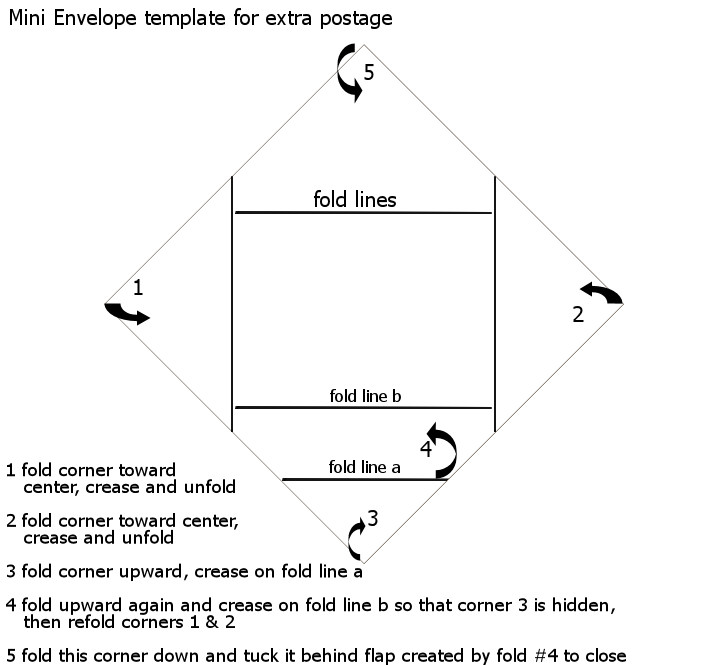
mini envie template
Once I found the size of the folded envelope, I made things even easier by taking a piece of chipboard and cutting it to just a tad smaller than the size of the finished envelope. I cut it so that it just fits inside the rectangle that you see made by the fold lines in the center of my template. If you've ever used Kreat-a-lope templates for making envelopes, this would be almost the same. I laid the chipboard in the center of the patterned paper and then folded along the edges, making that one extra fold at the bottom to create the piece that the flap will tuck behind. Take out the chipboard, tuck in the top flap, and done! It should look like the ones that I posted just below.
Thank you so much for this template!! I'll have to try this!
ReplyDeleteVERY COOL indeed, Jay! Thank you so much for sharing! :) And I'm sorry to hear about your DD... I've had the pox myself - NO FUN. Hope she recovers quickly! (((hugs)))
ReplyDelete